Running Cucumber scenarios with Serenity
For a complete, in-depth guide on using Cucumber with Serenity BDD and JUnit 5, including configuration options, best practices, and troubleshooting, see the dedicated Cucumber with JUnit 5 section.
To run Cucumber scenarios with Serenity, you need to create a Junit 5 test runner class like this:
   import org.junit.platform.suite.api.IncludeEngines;
   import org.junit.platform.suite.api.SelectClasspathResource;
   import org.junit.platform.suite.api.Suite;

   @Suite
   @IncludeEngines("cucumber")
   @SelectClasspathResource("/features")
   public class CucumberTestSuite {}
Note that you need to specify at least the features attribute, to define the directory containing your feature files.
Feature hierarchies
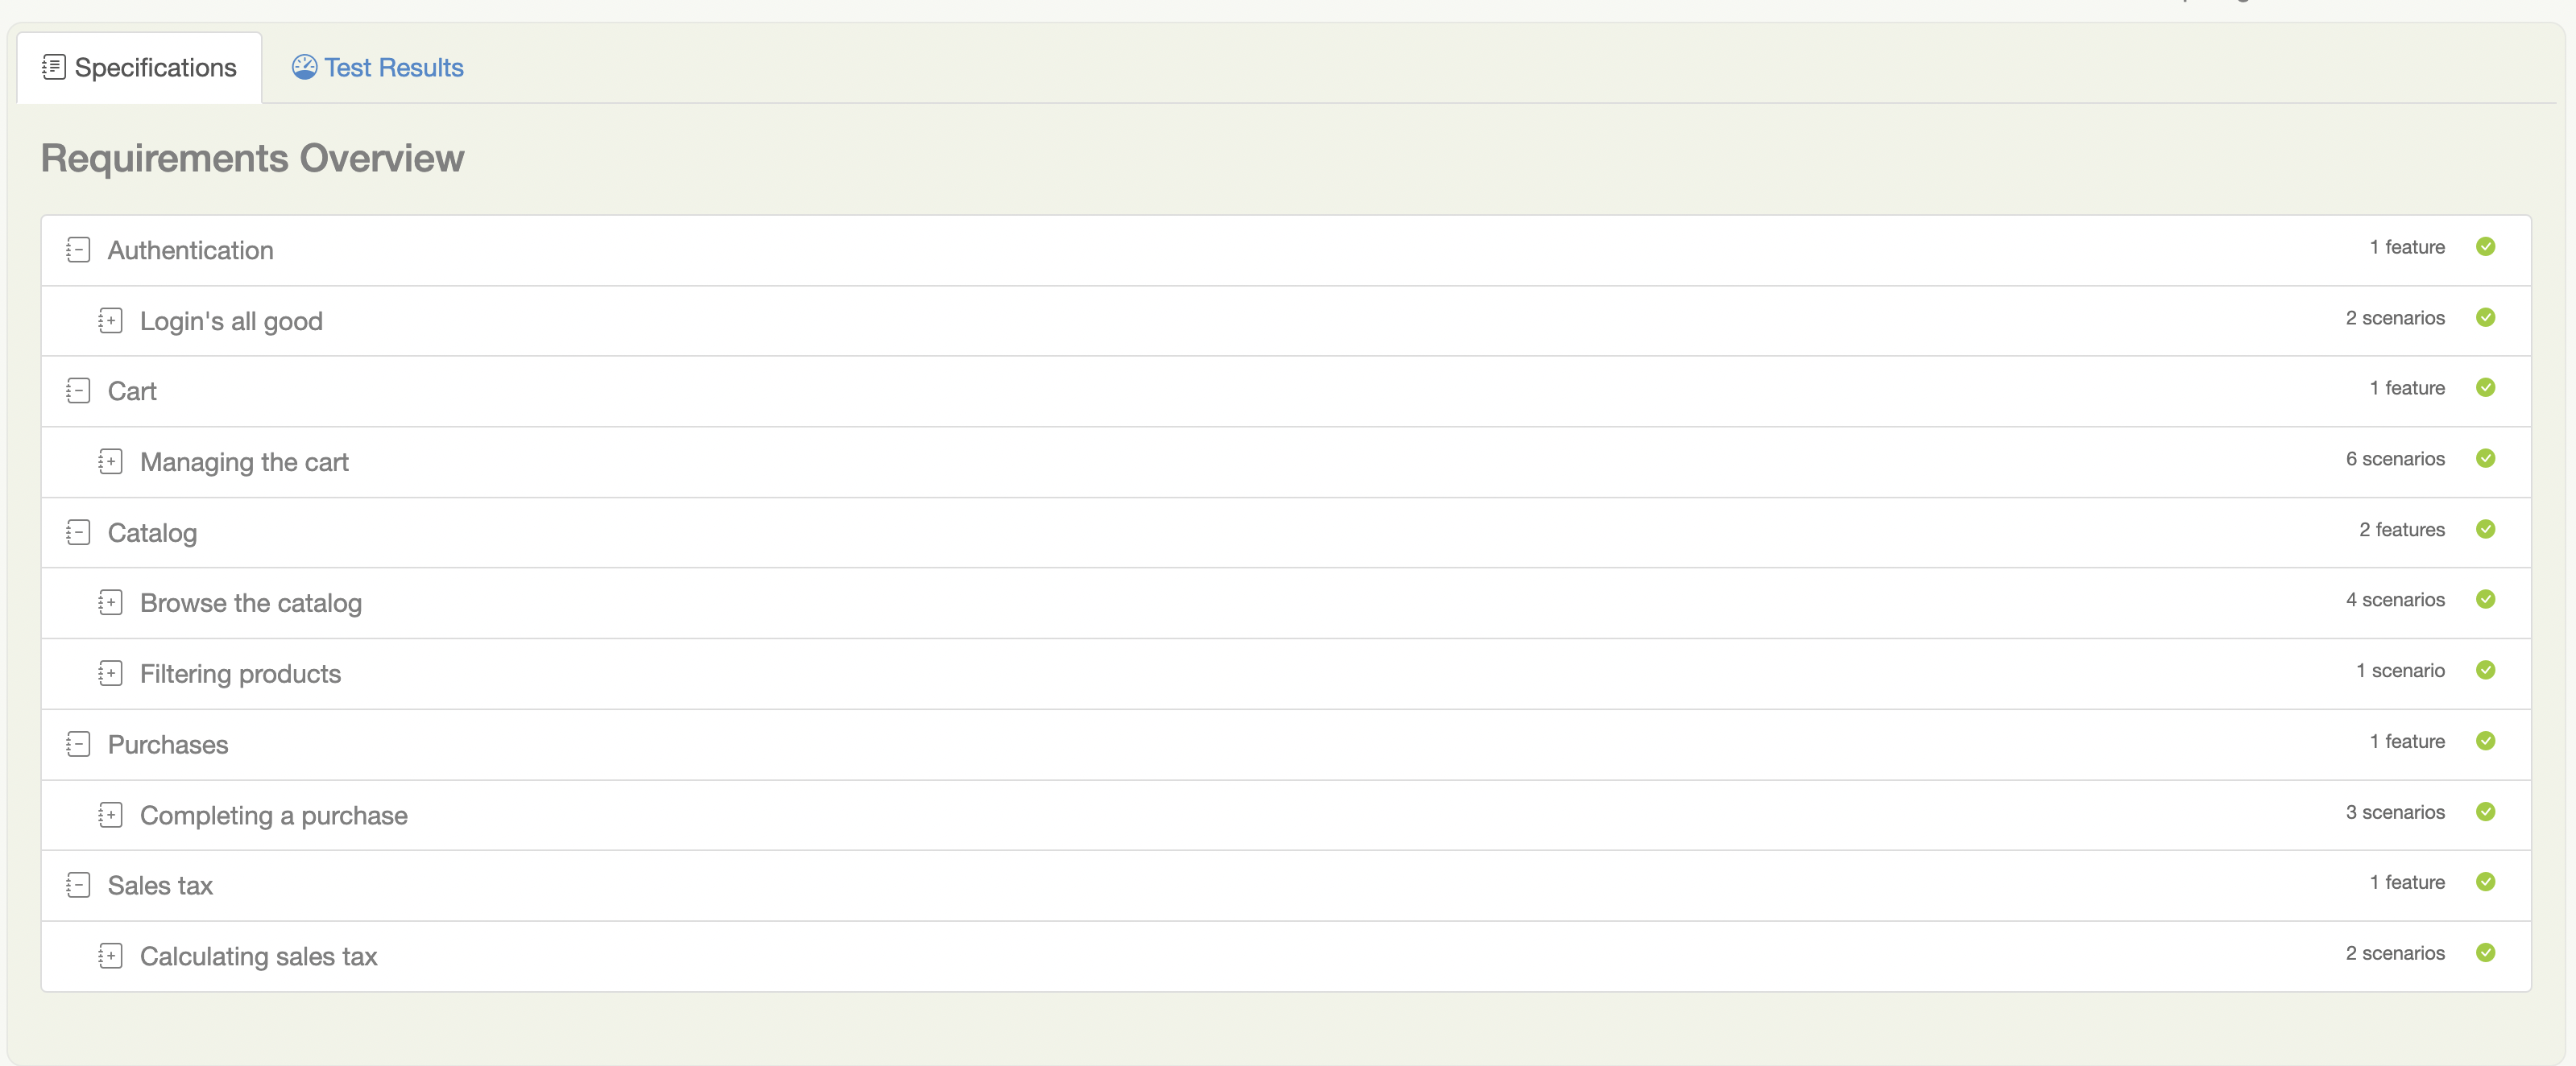
Serenity expects to find feature files in the src/test/resources/features folder by default. You can organise your feature files in a hierarchy of folders underneath this one, as shown here:
+ src
|-- test
|   |-- resources
|   |  |-- features
|   |  |   |-- authentication
|   |  |   |   |-- login.feature
|   |  |   |-- cart
|   |  |   |   |-- managing_the_cart.feature
|   |  |   |-- catalog
|   |  |   |   |-- browse_catalog.feature
|   |  |   |   |-- filtering_products.feature
|   |  |   |-- purchases
|   |  |   |   |-- completing_a_purchase.feature
|   |  |   |-- sales_tax
|   |  |   |   |-- calculating_sales_tax.feature
The directory structure will be used to build the Serenity requirements hierarchy, like the one shown here:
Filtering test execution in Cucumber
The simplest way to control which scenarios you want to execute is to use tags and the cucumber.filter.tags command line option. For example, to run only scenarios or features annotated with @smoke, you would run the following command:
mvn clean verify -Dcucumber.filter.tags="@smoke"
You can use Cucumber Tag Expressions to determine which scenarios to run. For example, to run only features with both the @authentication tag and the @smoke tag, you would run the following:
mvn clean verify -Dcucumber.filter.tags="@authentication and @smoke"
To run scenarios with either the @cart or the @catalog tag, you could run the following:
mvn clean verify -Dcucumber.filter.tags="@cart or @catalog"
Running Cucumber scenarios with Serenity in parallel
Starting with version 3.6.0, is possible to run the Cucumber scenarios in parallel.
The following steps are necessary to activate the parallel execution:
- Add following dependencies in your application pom.xml:
    <dependency>
        <groupId>io.cucumber</groupId>
        <artifactId>cucumber-junit-platform-engine</artifactId>
        <version>7.11.0</version>
        <scope>test</scope>
    </dependency>

    <dependency>
        <groupId>org.junit.platform</groupId>
        <artifactId>junit-platform-suite</artifactId>
        <version>1.9.2</version>
        <scope>test</scope>
    </dependency>
- Create a file named
junit-platform.propertiesundertest/resources
cucumber.execution.parallel.enabled=true
cucumber.execution.parallel.config.strategy=fixed
cucumber.execution.parallel.config.fixed.parallelism=4
cucumber.execution.parallel.config.fixed.max-pool-size=4
cucumber.plugin=net.serenitybdd.cucumber.core.plugin.SerenityReporterParallel
The Cucumber plugin path changed from io.cucumber.core.plugin.* to net.serenitybdd.cucumber.core.plugin.* in Serenity 5.0.0. Make sure to update your configuration files.
More informations about the meaning of the properties can be found in Cucumber JUnit Platform Engine Documentation
- Configure the classpath location of the scenarios to be executed in a Java class placed in a package under
test/java
   import org.junit.platform.suite.api.IncludeEngines;
   import org.junit.platform.suite.api.SelectClasspathResource;
   import org.junit.platform.suite.api.Suite;

   @Suite
   @IncludeEngines("cucumber")
   @SelectClasspathResource("/features")
   public class CucumberTestSuite {}