Screenplay Fundamentals
The Screenplay Pattern is a modern test automation design pattern intented to make it easier to write scalabble, maintainable test code. You can get a quick overview of a simple Screenplay test here.
In this section, we will look at how to write high quality test automation using the Screenplay pattern in more detail. We will intially focus on interacting with a web application using Selenium - in the following sections, we will see how to interact with APIs and databases using the Screenplay model.
In Screenplay we model actors who interact with an application in various ways to perform tasks that help them acheive their goals. Actors have abilities, such as the ability to interact with a web browser or query a database, that help them perform these tasks. Actors can also answer questions about the state of the system, so that we can check whether a feature is behaving the way we would expect it to.

Setting up a Screenplay test
Serenity BDD Screenplay tests can be written using any framwork that works with Serenity BDD. We will start by discussing how to set up a simple Serenity Screenplay test case using common libraries such as JUnit 4, JUnit 5 and Cucumber.
Screenplay and JUnit 4
Running a Screenplay test in JUnit 4 and JUnit 5 is no different to any other Serenity BDD test. For JUnit 4, add the serenity-junit dependency to your project if it is not already there:
        <dependency>
            <groupId>net.serenity-bdd</groupId>
            <artifactId>serenity-junit</artifactId>
            <version>${serenity.version}</version>
            <scope>test</scope>
        </dependency>
        <dependency>
            <groupId>net.serenity-bdd</groupId>
            <artifactId>serenity-screenplay</artifactId>
            <version>${serenity.version}</version>
            <scope>test</scope>
        </dependency>
        <dependency>
            <groupId>net.serenity-bdd</groupId>
            <artifactId>serenity-screenplay-webdriver</artifactId>
            <version>${serenity.version}</version>
            <scope>test</scope>
        </dependency>
Screenplay and JUnit 5 (Recommended)
For JUnit 5, add the following dependency to your project:
        <dependency>
            <groupId>net.serenity-bdd</groupId>
            <artifactId>serenity-junit5</artifactId>
            <version>${serenity.version}</version>
            <scope>test</scope>
        </dependency>
        <dependency>
            <groupId>net.serenity-bdd</groupId>
            <artifactId>serenity-screenplay</artifactId>
            <version>${serenity.version}</version>
            <scope>test</scope>
        </dependency>
        <dependency>
            <groupId>net.serenity-bdd</groupId>
            <artifactId>serenity-screenplay-webdriver</artifactId>
            <version>${serenity.version}</version>
            <scope>test</scope>
        </dependency>
Next, you need to use the SerenityJUnit5Extension class, like this:
import net.serenitybdd.junit.runners.SerenityJUnit5Extension;
import org.junit.jupiter.api.Test;

@ExtendWith(SerenityJUnit5Extension.class)
class AddNewTodos {

    @Test
    @DisplayName("Add a todo item to an empty list")
    void addToEmptyList() {...}
}
Screenplay and JUnit 4 (Deprecated)
JUnit 4 support is deprecated as of Serenity 5.0.0 and will be removed in Serenity 6.0.0. Please migrate to JUnit 5 (see above).
If you're still using JUnit 4, use the SerenityRunner class in your test class, like this:
import net.serenitybdd.junit.runners.SerenityRunner;
import org.junit.Test;

@RunWith(SerenityRunner.class)
public class AddNewTodos {

    @Test
    public void addToEmptyList() {...}
}
Screenplay and Cucumber
To run a Screenplay scenario with Cucumber and Serenity, you just need the standard Screenplay dependencies along with the serenity-cucumber dependency, as shown below:
        <dependency>
            <groupId>net.serenity-bdd</groupId>
            <artifactId>serenity-cucumber</artifactId>
            <version>${serenity.version}</version>
            <scope>test</scope>
        </dependency>
        <dependency>
            <groupId>net.serenity-bdd</groupId>
            <artifactId>serenity-screenplay</artifactId>
            <version>${serenity.version}</version>
            <scope>test</scope>
        </dependency>
        <dependency>
            <groupId>net.serenity-bdd</groupId>
            <artifactId>serenity-screenplay-webdriver</artifactId>
            <version>${serenity.version}</version>
            <scope>test</scope>
        </dependency>
With JUnit 5 (Recommended)
For JUnit 5, use the @Suite annotation with the Cucumber JUnit Platform Engine:
import org.junit.platform.suite.api.*;

import static io.cucumber.junit.platform.engine.Constants.PLUGIN_PROPERTY_NAME;

@Suite
@IncludeEngines("cucumber")
@SelectClasspathResource("features")
@ConfigurationParameter(
    key = PLUGIN_PROPERTY_NAME,
    value = "net.serenitybdd.cucumber.core.plugin.SerenityReporterParallel"
)
class TestSuite {}
With JUnit 4 (Deprecated)
JUnit 4 Cucumber runners are deprecated as of Serenity 5.0.0 and will be removed in Serenity 6.0.0. Please migrate to JUnit 5 (see above).
For JUnit 4, you would use:
import io.cucumber.junit.CucumberOptions;
import net.serenitybdd.cucumber.CucumberWithSerenity;
import org.junit.runner.RunWith;

@RunWith(CucumberWithSerenity.class)
@CucumberOptions(
        features = "classpath:features"
)
public class TestSuite {}
Defining the actors
Every Screenplay test needs at least one actor (and some have several). There are several ways we can define an actor, which vary slightly depending on the test framework you are using.
Actors in JUnit
One way to create a new actor is to use the Actor.named() method. For example, to create an actor named Toby, we could write the following:
Actor toby = Actor.named("Toby");
However this actor will not be able to do very much until we give him the ability to interact with our application. That's where abilities come into play.
The most commonly-needed ability is the ability to browse the web using a web automation library such as Selenium or Playwright. In a Serenity JUnit test, we can use the @Managed annotation to manage the WebDriver lifecycle. Once we have a driver available, we can assign it to an actor using the BrowseTheWeb class like this:
@ExtendWith(SerenityJUnit5Extension.class)
class AddNewTodosWithAManagedDriver {

    @Managed
    WebDriver driver;

    @Test
    @DisplayName("Add a todo item to an empty list")
    void addToEmptyList() {
        Actor toby = Actor.named("Toby")
                          .whoCan(BrowseTheWeb.with(driver));
    ...
    }
}
Defining actors using the CastMember annotation
For many scenarios we can simplify this code shown above. If we just need to use an actor who can interact with a website using Selenium, we can use the @CastMember annotation. This annotation will configure an actor with a WebDriver instance, and manage the browser lifecycle for us (so no need for the @Managed annotation or WebDriver variable). You can see an example of this annotation in action here:
@ExtendWith(SerenityJUnit5Extension.class)
class AddNewTodosWithACastMember {

    @CastMember
    Actor toby;

    @Test
    @DisplayName("Add a todo item to an empty list")
    void addToEmptyList() {

        toby.attemptsTo(
                Open.browserOn().the(TodoMvcPage.class),
                Enter.theValue("Buy some milk").into(".new-todo").thenHit(Keys.RETURN)
        );
        Collection<String> items = toby.asksFor(Text.ofEach(".todo-list label"));
        assertThat(items).containsExactly("Buy some milk");

        String title = toby.asksFor(Text.of(By.tagName("h1")));
        assertThat(title).isEqualTo("todos");
    }
}
The name of the actor will be derived from the name of the variable. If you need a more descriptive name, you can use the name attribute to provide a free text value, which will be used in the reports:
    @CastMember(name = "Tim the Enchanter")
    Actor tim;
Actors in Cucumber
Setting up actors in Cucumber is a little more compicated than in JUnit, because we generally refer to them by name in the Cucumber scenarios. Suppose for example we want to automate the following scenario:
  Scenario: Add items to an empty list
    Given Toby starts with an empty list
    When he adds "Buy some milk" to his list
    Then the todo list should contain the following items:
      | Buy some milk |
Using a Managed driver with Cucumber
We can use the same approach as we used for JUnit in our Cucumber step definition files, declaring a Webdriver instance using the @Managed annotation and assigning it to our actor using the BrowseTheWeb ability class:
public class TodoStepDefinitions {

    @Managed
    WebDriver driver;

    Actor toby = Actor.named("Toby");

    @Before
    public void setupActor() {
        toby.can(BrowseTheWeb.with(driver));
    }

    @Given("Toby starts with an empty list")
    public void stats_with_an_empty_list() {
        toby.attemptsTo(
                Open.url("https://todomvc.com/examples/angularjs/#/")
        );
    }
However, the name of the actor ("Toby") is part of the scenario steps. We may want to have other scenarios with other actors, or have a scenario involving more than one actor.
Casts and Stages
We can make our Cucumber step definitions more flexible by introducing the concept of a Cast of actors, and a stage on which they perform.
A Cast is a class whose job is to provide actors with a specific set of abilities, when we need them to play a role in our tests. For example, we can use the OnlineCast class to provide actors who are equiped with their own Webdriver instances. This way, we don't need to declare the @Managed driver, and each actor can have their own browser if we have a scenario with more than one actor.
A stage is where our actors perform their roles. A scenario has a single stage, that we can use to identify an actor by name or find the currently active actor.
We need to assign a cast to the stage at the start of each scenario; we can do this by calling the OnStage.setTheStage() method and passing in a specific cast, like this:
OnStage.setTheStage(new OnlineCast());
Once we have set the stage, we can obtain an actor with a given name using the OnStage.theActorCalled() method, like this:
Actor toby = OnStage.theActorCalled("Toby");
Using this approach, we could implement the first step of our scenario in a way that will work no matter which actor is involved, like this:
    @Given("{word} starts with an empty list")
    public void stats_with_an_empty_list(String actorName) {
        Actor actor = OnStage.theActorCalled(actorName);
        actor.attemptsTo(
                Open.url("https://todomvc.com/examples/angularjs/#/")
        );
    }
It is often useful to define a custom Cucumber expression so that we don't have to call the OnStage.theActorCalled() method each time:
    @ParameterType(".*")
    public Actor actor(String actorName) {
        return OnStage.theActorCalled(actorName);
    }

    @Given("{actor} starts with an empty list")
    public void stats_with_an_empty_list(Actor actor) {
        actor.attemptsTo(
                Open.url("https://todomvc.com/examples/angularjs/#/")
        );
    }
This way, our next step can simply use a parameter of type Actor, like this:
    @When("{actor} adds {string} to his list")
    public void he_adds_to_his_list(Actor actor, String item) {
        actor.attemptsTo(
                Enter.theValue(item).into(".new-todo").thenHit(Keys.RETURN)
        );
    }
These methods are defined out-of-the-box with the Serenity Cucumber Starter template on Github, so you don't need to add them yourself if you are using this template.
The OnStage class also recognises pronouns - when an expression such as "he adds 'Walk the dog' to the todo list" or "her shopping cart should be empty", the theActorCalled() method will recognise the pronoun and fetch the last active actor with the theActorInTheSpotlight() method. By default, the pronouns are:
- he
- she
- they
- it
- his
- her
- their
- its
You can define your own list of pronouns using the
screenplay.pronounsSerenity property in theserenity.conffile, e.g.
screenplay.pronouns=il,elle,ils,elles,son,sa,leur,leurs
Casts and Abilities
In the previous code, we used the OnlineCast class to define the cast of actors:
OnStage.setTheStage(new OnlineCast());
Casts are very flexible, and we can set them up to produce actors with additional abilities if we need to.
For example, imagine we wanted to give our actors the ability to deliver some coffee. To do this, we can create a Deliver ability class. To deliver a coffee, we will call the deliverItem() method, which will (for our purposes) simply return a string with an item with a unique number (such as "Coffee #1").
The Ability class could look like this:
    public class Deliver implements Ability {
        final String item;
        private int counter = 1;

        private Deliver(String item) {
            this.item = item;
        }

        public static some(String item) {
            return new Deliver(item)
        }

        public String deliverItem() {
            return item + " #" + counter++;
        }
    }
Now we can assign this ability to our actors in the Cast by using the Cast.whereEveryoneCan() method:
OnStage.setTheStage(
    Cast.whereEveryoneCan(Fetch.some("Coffee"))
);
If we needed a more complex setup, we can also use a Lambda expression to provide the code we need to execute to enhance a new actor with additional abilities, like this:
Consumer<Actor> fetchTheCoffee = { actor -> actor.whoCan(Fetch.some("Coffee")) }

OnStage.setTheStage(
    Cast.whereEveryoneCan(fetchTheCoffee)
);
The Actor in the spotlight
Sometimes a step does not refer to an actor by name, but implicitly refers to the last actor who did anything in the scenario. For example, the third step, "Then the todo list should contain the following items..." does not have an explicit actor.
In these situations, we can use the OnStage.theActorInTheSpotlight() method to refer to the last known active actor. For example, we could implement the third step of our scenario like this:
    @Then("the todo list should contain the following items:")
    public void the_todo_list_should_contain(List<String> expectedItems) {
        Actor currentActor = OnStage.theActorInTheSpotlight();
        var todos = currentActor.asksFor(Text.ofEach(".todo-list li"));
        assertThat(todos).containsExactlyElementsOf(expectedItems);
    }
Grouping interactions into tasks
Screenplay aims to make it easy to write maintainable and scaleable automation code. And an important way to do this is by grouping interactions into reusable sequences that represent higher level domain concepts.
For example, the following test shows how to login to the https://www.saucedemo.com/ test site:
        toby.attemptsTo(
                Open.url("https://www.saucedemo.com/"),
                Enter.theValue("standard_user").into("#user-name"),
                Enter.theValue("secret_sauce").into("#password"),
                Click.on("#login-button")
        );
These four lines involve all login in to the site. However it is hard to see that at a glance when reading the code. We could make this code much more readable by grouping these interactions into a single task.
Grouping interactions using the Task class
A better approach would be to group these related interactions into a single Task.
The simplest way to do this is to use the Task.where() method. This method lets us return a task (or more precisely, an implementation of the Performable interface) that combines several other tasks or interactions.
The task that allows an actor to login as a standard user could look like this:
public class Login {
    public static Task asAStandardUser() {
        return Task.where(
                Open.url("https://www.saucedemo.com/"),
                Enter.theValue("standard_user").into("#user-name"),
                Enter.theValue("secret_sauce").into("#password"),
                Click.on("#login-button")
        );
    }
}
We might want to make our task more configurable, by adding some parameters to the method signature. In this case, it is useful to make our task more descriptive by adding a text description before the list of _Performable_s, as shown below. This description will appear in the reports whenever the task is executed. The {0} in the description will be replaced by the name of the actor (so "Toby" in our test).
public class Login {
    public static Performable as(String username, String password) {
        return Task.where(
                "{0} logs in as " + username,
                Open.url("https://www.saucedemo.com/"),
                Enter.theValue(username).into("#user-name"),
                Enter.theValue(password).into("#password"),
                Click.on("#login-button")
        );
    }
}
We can now refactor our original test using this method:
toby.attemptsTo(Login.asAStandardUser());
or
toby.attemptsTo(Login.as("standard_user","secret_sauce"));
Using lambda expressions to create custom tasks
So far we havce seen how to create a Task from a list of other tasks or interactions. But sometimes we need to have more control over the logic of our task. We can do this very easily using lambda expressions, which give us total control over how our task should work.
For example, imagine we have refactored our TodoMVC example above to use the following Task class to open the TodoMVC application with an empty list:
public class Start {
    public static Performable withAnEmptyTodoList() {
        return Task.where("{0} starts with an empty todo list",
                Open.url("https://todomvc.com/examples/angularjs/#/")
        );
    }
We could also create a task to add a todo item to the list:
public class AddATodoItem {
    public static Performable called(String thingToDo) {
        return Task.where("{0} adds a todo item called " + thingToDo,
                Enter.theValue(item).into(".new-todo").thenHit(Keys.RETURN)
        );
    }
}
Now suppose we want to allow Toby to start with some elements already in his list. We could imagine a new Start.withAListContainingTheItems(...) method like this:
        toby.attemptsTo(
                Start.withAListContaingTheItems("Feed the cat","Buy some bread")
        );
However to implement this method, we need to loop over the provided list of items, and call the AddATodoItem task for each of them. We can do this by using a Lambda expression instead of a list of _Performable_s. The Lambda expression takes an actor as a parameter, and allows us to write arbitrary blocks of code to implement our task. For example, the withAListContaingTheItems() method might look like the following:
    public static Performable withAListContainingTheItems(String... items) {
        return Task.where("{0} starts with a list containing " + Arrays.asList(items),
                actor -> {
                    actor.attemptsTo(Start.withAnEmptyTodoList());
                    for (String item : items) {
                        actor.attemptsTo(AddATodoItem.called(item));
                    }
                }
        );
The full Start class would now look like this:
public class Start {
    public static Performable withAnEmptyTodoList() {
        return Task.where("{0} starts with an empty todo list",
                Open.url("https://todomvc.com/examples/angularjs/#/")
        );
    }

    public static Performable withAListContainingTheItems(String... items) {
        return Task.where("{0} starts with a list containing " + Arrays.asList(items),
                actor -> {
                    actor.attemptsTo(Start.withAnEmptyTodoList());
                    for (String item : items) {
                        actor.attemptsTo(AddATodoItem.called(item));
                    }
                }
        );
    }
}
Writing custom Performable classes.
Sometimes we need more control over the creation of a Task. We can do this by creating a class that implements the Performable interface.
The Performable interface has a single method that you need to implement: performAs(). This method takes an Actor as a parameter. A very simple custom task might look like this:
public class AddItem implements Performable {
    @Override
    public <T extends Actor> void performAs(T actor) {
        actor.attemptsTo(
                Enter.theValue("Buy some milk")
                        .into(".new-todo")
                        .thenHit(Keys.RETURN)
        );
    }
}
Now we can use this class directly in our tests:
    AddItem addANewItem = new AddItem();
    toby.attemptsTo(addANewItem);
By default, Serenity will record this action in the reports using the name of the actor and the name of the class, so in this case, the report would include something like "Toby add item". If we want a more descriptive text, we can add the @Step annotation to the performAs() method, as shown here (the "0" placeholder will be replaced by the name of the actor):
public class AddItem implements Performable {
    @Override
    @Step("{0} adds an item to the list")
    public <T extends Actor> void performAs(T actor) {
        actor.attemptsTo(
                Enter.theValue("Buy some milk")
                        .into(".new-todo")
                        .thenHit(Keys.RETURN)
        );
    }
}
In this class, we can only add the item "Buy some milk" to our list. We could make our class more flexible by recordinh the name of the task as a parameter. To do this, we need to add a member variable to our Performable to represent this value, and pass it in to the constructor:
public class AddItem implements Performable {
    private String name;

    public AddItem(String name) {
        this.name = name;
    }

    @Override
    @Step("{0} adds an item to the list")
    public <T extends Actor> void performAs(T actor) {
        actor.attemptsTo(
                Enter.theValue(name)
                        .into(".new-todo")
                        .thenHit(Keys.RETURN)
        );
    }

    public static AddItem called(String name) {
        return new AddItem(name);
    }
}
We can now make our test code more readable, as shown here:
toby.attemptsTo(AddItem.named("Walk the dog"));
However there is one more thing we need to do to make this work correctly. The code shown here will not be correctly reported in the Serenity reports. For technical reasons, every Performable implementation must have a default constructor, even if you don't use it directly in your code. So the complete implementation will look like this:
public class AddItem implements Performable {
    private String name;

    public AddItem() {}

    public AddItem(String name) {
        this.name = name;
    }

    @Override
    @Step("{0} adds an item to the list")
    public <T extends Actor> void performAs(T actor) {
        actor.attemptsTo(
                Enter.theValue(name)
                        .into(".new-todo")
                        .thenHit(Keys.RETURN)
        );
    }

    public static AddItem called(String name) {
        return new AddItem(name);
    }
}
Always remember to add a default constructor with no parameters to your Performable implementations, otherwise they will not appear correctly in the reports.
Questions - querying the state of the system
Screenplay is an actor-centric pattern, and just as actors interact with the system by performing tasks and interactions, they can query the state of the system by asking questions.
Using bundled Question classes
An actor can ask a question by using the askFor() method. You can see an example of how this works here:
String pageTitle = toby.asksFor(Text.of(".title"));
Text is an example of a Question Factory. Question Factories provide a convenient way to query the state of the application, and there are many to choose from. For example, we could check whether a particular web element was visible using the Visibility class, like this:
boolean isVisible = toby.asksFor(Visibility.of(".title"));
Serenity BDD comes with lot bundled Question Factories like these, and we will look at them in more detail in the next section. But you can also write your own custom questions, to query any aspect of your application that you like.
Creating custom Questions using Lambda expressions
One way to implement a Question is to use a Java 8 Lambda expression that takes an Actor as an argument. For example, the following method returns an Integer Question (a Question that returns an integer).
    Question<Integer> numberOfTodoItems() {
        return actor -> BrowseTheWeb.as(actor).findAll(".todo-list li").size();
    }
We could find the answer to this question using the asksFor() method, as in the previous example:
int numberOfTodos = toby.asksFor(numberOfTodoItems());
An alternative to the asksFor() method is the Question's own answeredBy() method:
int numberOfTodos = numberOfTodoItems().answeredBy(toby);
This format can be more convenient for assertions, as illustrated in this example:
assertThat(numberOfTodoItems().answeredBy(toby)).isEqualTo(1);
Making questions more readable with the Question.about() method
We could make this method more readable by using the Question.about format - this will produce a more meaningful error message. In the following example, we use the BrowseTheWeb class to access the Serenity WebDriver API and find the number of todo list items currently on the page:
    Question<Integer> numberOfTodoItems() {
        return Question.about("the number of todo items")
                   .answeredBy(
                       actor -> BrowseTheWeb.as(actor).findAll(".todo-list li").size());
    }
Converting Questions
Questions also provide a convenient way to convert responses into different types. This is particularly useful for the bundled WebDriver Question classes, that typically return values in text form.
For example, the TodoMVC application shows the number of items remaining to do at any time beneath the list:
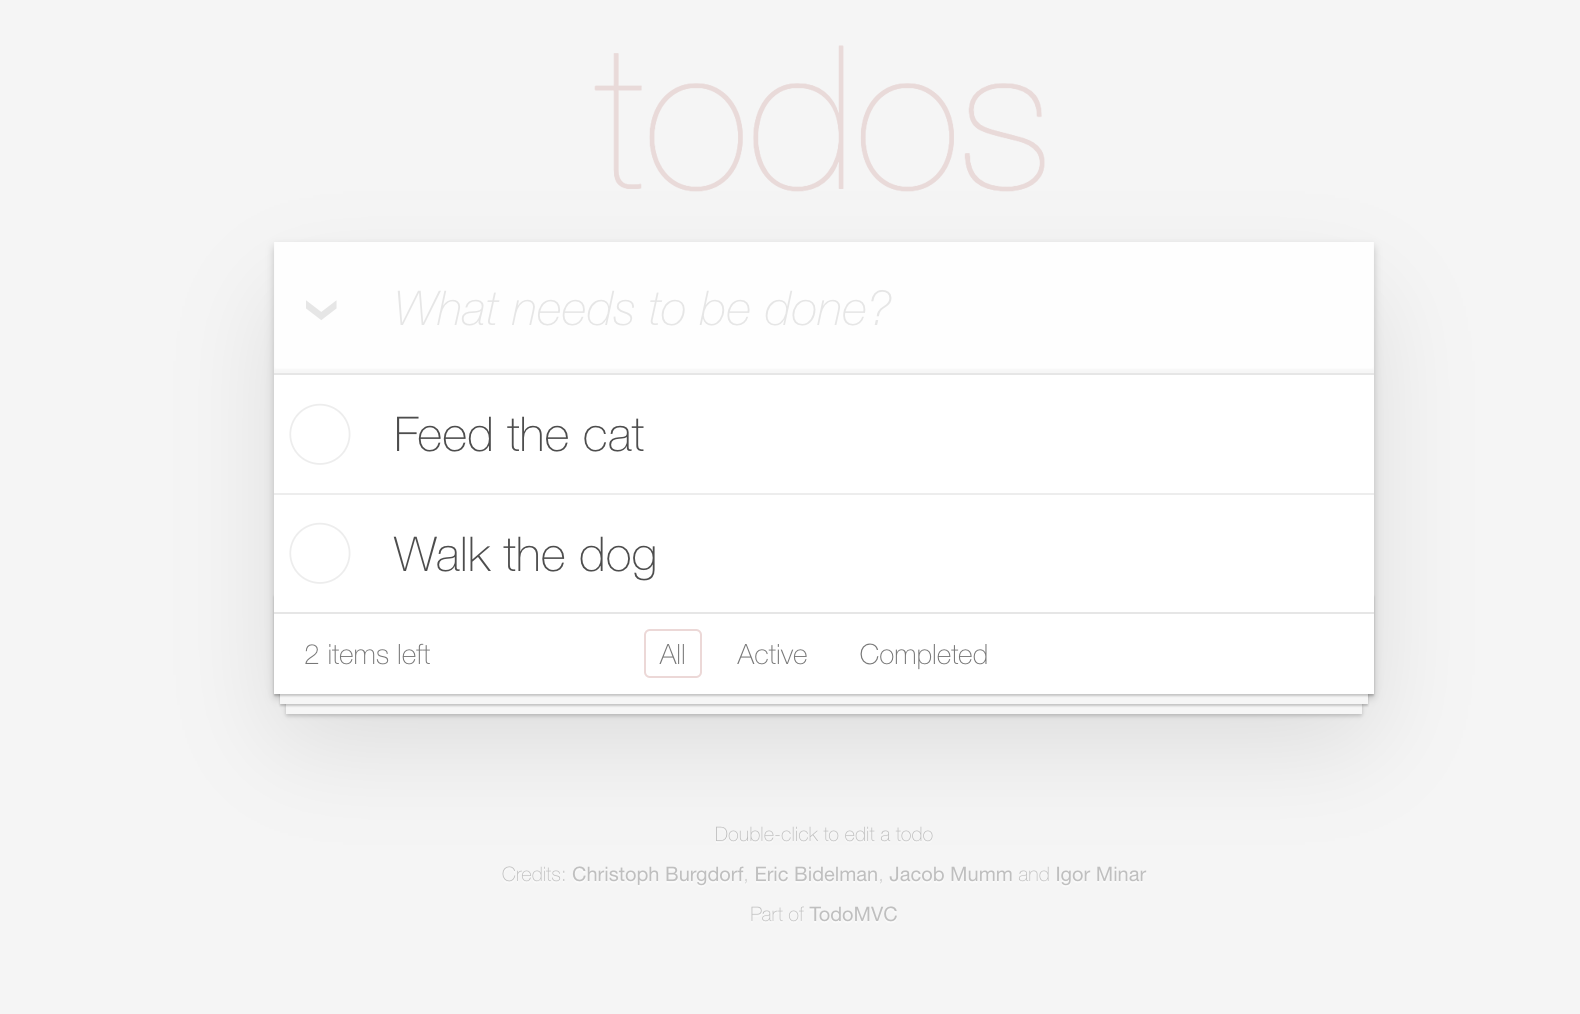
We can locate the item count using the CSS expression ".todo-count strong". We could fetch this value as a String using the Text class we saw previously:
String itemsLeftCount = toby.asksFor(Text.of(".todo-count strong");
However if we prefer to retrieve the value as an integer, we could use the asInteger() method like this:
int itemsLeftCount = toby.asksFor(Text.of(".todo-count strong").asInteger());
Some of the conversion methods available include the following:
| Type | Method | Example |
|---|---|---|
| Integer | asInteger() | Text.of(".todo-count strong").asInteger() |
| Long | asLong() | Text.of(".todo-count strong").asLong() |
| Float | asFloat() | Text.of(".currency-value").asFloat() |
| Double | asDouble() | Text.of(".currency-value").asDouble() |
| BigDecimal | asBigDecimal() | Text.of(".currency-value").asBigDecimal() |
Converting date values
Date values can also be converted to LocalDate objects. If the date uses the standard ISO date format (e.g. "2022-05-15"), it can be converted using the asDate() method, like this:
   LocalDate dateValue = toby.asksFor(
       Text.of("#departure-date").asDate()
    );
If the date uses a different format, the asDate() method takes a date-time pattern that can be used to parse the value, e.g.
    LocalDate dateValue = toby.asksFor(
        Text.of("#departure-date").asDate("d MMM uuuu")
    );
Converting to lists of values
We can also use the asListOf() method to find all the answers to a specific question, and convert each of them to a specified type. For example, to convert a list of matching String values to integers, we could use the following code:
    List<Integer> itemQuantities = toby.asksFor(
        Text.of(".item-quantity").asListOf(Integer.class)
    );
Working with collections
Another way to retrieve a list of values is to use the ofEach() method.
Collection<String> itemQuantities = toby.asksFor(Text.of(".item-quantity"));
As with the Text.of() method, we can use the asListOf() method to convert this collection into another type
    List<String> itemQuantities = toby.asksFor(
        Text.of(".item-quantity").asListOf(Integer.class)
    );
If we need to perform a more complex operation, we can use the mapEach() method to apply an arbitrary Lambda expression to each matching element:
Collection<Integer> nameLengths = toby.asksFor(Text.ofEach(".name").mapEach(s -> s.length()));
Actor-specific session data
Sometimes we need to store information in a step or task and reuse it in a subsequent one. Each Screenplay actor can remember information, and retrieve it later on in the test. We do this using the remember() method:
    int actualCost = 100
    actor.remember("Total Cost", total);
Later on, we can retrieve this information using the recall() method:
    int recalledCost = dana.recall("Total Cost");
    assertThat(recalledCost).isEqualTo(100);
An actor can remember information of any type, even the answer to a question. For example,the Text.of() method returns a Question object of type Question<String>. An actor can remember the answer to this question by using it as a parameter to the remember() method:
actor.remember("Total Cost", Text.of("#total-cost").asInteger());
We can then recall this value in the same way as any other:
    int totalCost = actor.recall("Total Cost");
    assertThat(totalCost).isEqualTo(100);
We can even recall a map containing every value currently remembered by the actor. We do this using the recallAll() method:
Map<String, Object> all = actor.recallAll();
We can also remove a remembered value using the forget() method:
actor.forget("Total Cost");
Conclusion
Now that we have seen how to set up a Screenplay test using different frameworks, how to organise interactions into tasks, and how to query the state of the system, we will look at how to use Screenplay to interact with a web application in more detail.