Your First Screenplay Scenario
The Screenplay Pattern is a way to write clean, readable, scalable test automation modeled around the user.
Screenplay builds on good software engineering principles such as the Single Responsibility Principle, the Open-Closed Principle, and effective use of Layers of Abstraction. It encourages good testing habits and well-designed test suites that are easy to read, easy to maintain and easy to extend, enabling teams to write more robust and more reliable automated tests more effectively.
In this section, we will show you how to write your first Screenplay scenario using Serenity BDD. You will learn how to write a simple scenario for the well-known TodoMVC project.

Pre-requisites
To run this tutorial, you will need a few things installed on your machine:
- Java: Serenity BDD is a Java library, so you'll need a recent JDK installed. JDK 17 or higher should be fine.
- A Java IDE: You'll also need a Java Development Environment such as IntelliJ or Eclipse (and a working knowledge of Java).
- Git: We'll be using a starter project on Github, and the sample code for this project lives on Github too, so I'll be assuming you have a basic understanding of Git. You will also need a Git client installed on your computer.
Introducing the Screenplay Pattern
The goal of the Screenplay pattern is to help you write cleaner, more readable, more maintainable test automation code for any domain. With Screenplay, your tests use an intuitive, readable style like the following:
        wendy.attemptsTo(
                Navigate.toTheHomePage(),
                Search.byKeyword("Everest"),
                Ensure.that(DisplayedArticle.firstHeading()).isEqualTo("Mount Everest")
        );
As you can see here, Screenplay uses a user-centric model, where we describe actors who interact with an application in various ways to perform tasks that help them achieve their goals. Actors have abilities, such as the ability to interact with a web browser or query a database, that help them perform these tasks. Actors can also answer questions about the state of the system, so that we can check whether a feature is behaving the way we would expect it to.

Creating a Screenplay project
Using the Serenity template projects
The quickest way to start a new Screenplay project is to clone one of the starter projects. For this tutorial, we will start with the Serenity JUnit Screenplay Starter project, which uses Serenity Screenplay and JUnit 5.
This starter project has a sample Screenplay test in the src/test/java/starter/wikipedia folder. You won't need this code for this tutorial so you can safely delete it.
The project directory structure
We will use some simple conventions to organise our test classes, based on the standard Maven project structure you can see here:
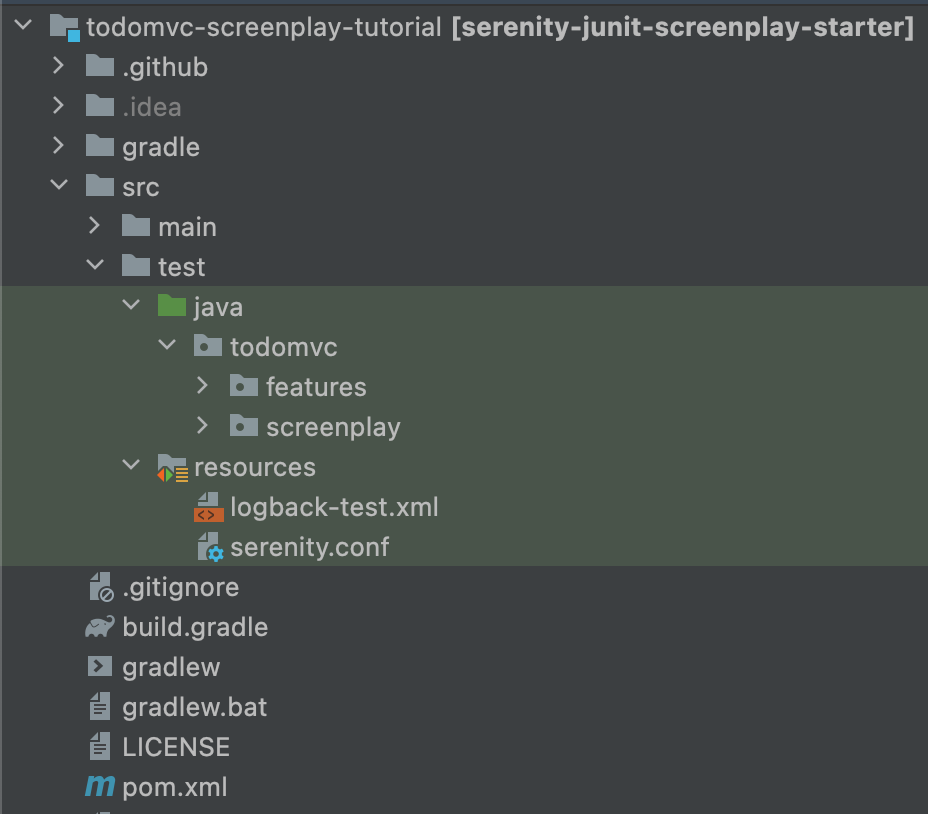
Our test code will be stored in two folders, underneath src/test/java/todomvc. The first directory named features will contain our test classes. The second, screenplay, will contain our Screenplay classes. Screenplay classes are designed to be highly modular and reusable, and often appear in many tests, so it makes sense to keep them separate from the tests themselves.
Serenity organises JUnit test results based on the package structure we use, so we need to tell it the name of the root package where our tests will live. We do this in the serenity.conf file in the src/test/resources folder. Open this file and add the following line:
serenity.test.root = todomvc.features
Writing your first scenario
Creating the test case
For our first scenario, we will simply add a 'to do' item (say, "Buy some milk") to an empty list.
Start by creating a new empty test case under the src/test/java/todomvc/features package like this:
package todomvc.features;

import net.serenitybdd.junit5.SerenityJUnit5Extension;
import org.junit.jupiter.api.DisplayName;
import org.junit.jupiter.api.Test;
import org.junit.jupiter.api.extension.ExtendWith;

@ExtendWith(SerenityJUnit5Extension.class)
class AddNewTodos {

    @Test
    @DisplayName("Add a todo item to an empty list")
    void addToEmptyList() {
    }
}
The line @ExtendWith(SerenityJUnit5Extension.class) indicates that this is a Serenity BDD test.
Introducing the actor
Screenplay uses an actor-centric approach, where our tests describe actors, who represent actual users of our application, and the actions they perform.
In a Serenity BDD JUnit test, we can use the @CastMember annotation to declare an actor like this:
    @CastMember(name = "Toby")
    Actor toby;
This will instantiate a new actor (called Toby) for our test, and assign a webdriver instance that he can use to interact with our application.
Actors perform tasks and interactions
In a Screenplay test, everything starts with the actor, who interacts with the system under test to achieve their goals. In this case, the first thing Toby needs to do is to open the TodoMvc application at a given URL. We do this by calling the attemptsTo() method on the Actor class. The attemptsTo() method takes a list of actions that the actor needs to perform. We call these actions performables. We generally talk about two types of performables:
- Interactions, where the actor interacts directly with the application (Click a button or Open a URL), and
- Tasks, which are groups of interactions that the actor needs to perform to achieve some goal (Add an item to the cart or purchase an item).
An example of a simple Interaction is the Open.url() interaction, which opens a given URL.
Open.url("https://todomvc.com/examples/angularjs/#/")
In our "add a todo item to an empty list" test, the first step will be for Toby to open the browser on the TodoMVC application home page. We can do this with the following code:
@Test
@DisplayName("Add a todo item to an empty list")
void addToEmptyList() {
    toby.attemptsTo(
        Open.url("https://todomvc.com/examples/angularjs/#/")
    );
}
Actors can interact with a web application
The next thing we need to do is to enter a value into the input field on the TodoMVC home page that you can see here:
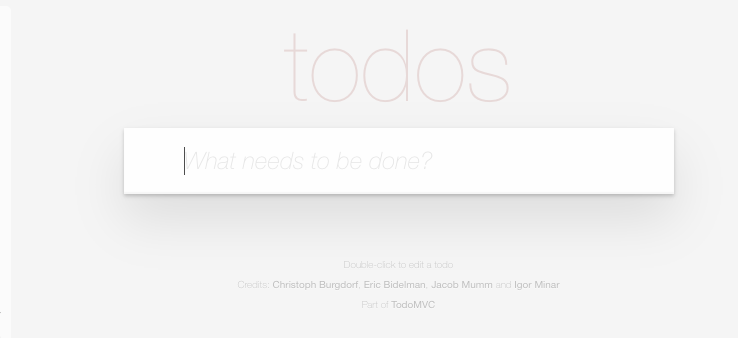
To enter a value into a field, we can use the Enter interaction class. This field can be located using a CSS locator like ".new-todo". So to enter the value into this field, we can use the following interaction:
Enter.theValue("Buy some milk").into(".new-todo")
There is no submit button on this form. To add the item to the list, we need to press the RETURN key. We can do this by adding the thenHit() method, like this:
Enter.theValue("Buy some milk").into(".new-todo").thenHit(Keys.RETURN)
When we add this to our test, we get the following:
@Test
@DisplayName("Add a todo item to an empty list")
void addToEmptyList() {
    toby.attemptsTo(
        Open.url("https://todomvc.com/examples/angularjs/#/"),
        Enter.theValue("Buy some milk").into(".new-todo").thenHit(Keys.RETURN)
    );
}
Actors can ask about the state of the system
Once Toby hits RETURN, the item will be added to the todo list, as we can see here:
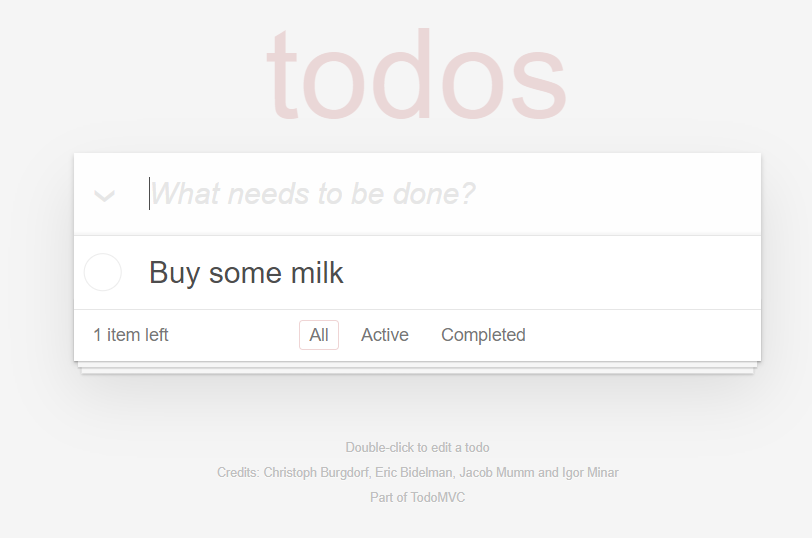
Now we need to check that the item we entered was successfully added to this list. In Screenplay we do this using Questions. A Question is a class that knows how to retrieve a specific piece of information about the state of the application. This could be the value of a text field, the result of a REST API call, or even the result of a database query.
In this case, we can identify the names of the todo items in the list using a CSS locator such as ".todo-list li". So a question to retrieve each of the todo items displayed on the page might look like this:
Text.ofEach(".todo-list li")
A question does nothing by itself - just as we need an actor to perform an interaction, we also need an actor to ask a question.
One way we do this is to use the asksFor() method, like this:
var todos = toby.asksFor(Text.ofEach(".todo-list label"));
If we add an AssertJ assertion to check that the list contains the value we expect, our completed test will look like the following:
import net.serenitybdd.junit5.SerenityJUnit5Extension;
import net.serenitybdd.screenplay.Actor;
import net.serenitybdd.screenplay.actions.Enter;
import net.serenitybdd.screenplay.actions.Open;
import net.serenitybdd.screenplay.annotations.CastMember;
import net.serenitybdd.screenplay.questions.Text;
import org.junit.jupiter.api.DisplayName;
import org.junit.jupiter.api.Test;
import org.junit.jupiter.api.extension.ExtendWith;
import org.openqa.selenium.Keys;

import static org.assertj.core.api.Assertions.assertThat;

@ExtendWith(SerenityJUnit5Extension.class)
class AddNewTodos {

    @CastMember(name = "Toby")
    Actor toby;

    @Test
    @DisplayName("Add a todo item to an empty list")
    void addToEmptyList() {
        toby.attemptsTo(
                Open.url("https://todomvc.com/examples/angularjs/#/"),
                Enter.theValue("Buy some milk").into(".new-todo").thenHit(Keys.RETURN)
        );
        var todos = toby.asksFor(Text.ofEach(".todo-list li"));
        assertThat(todos).containsExactly("Buy some milk");
    }
}
Generating the reports
Let's run the tests and see what the reports look like. Just run mvn clean verify from the command line. You should see an output along the following lines:
$ mvn verify
...
[INFO] -----------------------------------------
[INFO]  SERENITY TESTS: SUCCESS
[INFO] -----------------------------------------
[INFO] | Test cases executed    | 1
[INFO] | Tests executed         | 1
[INFO] | Tests passed           | 1
[INFO] | Tests failed           | 0
[INFO] | Tests with errors      | 0
[INFO] | Tests compromised      | 0
[INFO] | Tests aborted          | 0
[INFO] | Tests pending          | 0
[INFO] | Tests ignored/skipped  | 0
[INFO] ------------------------ | --------------
[INFO] | Total Duration         | 7s 292ms
[INFO] | Fastest test took      | 7s 292ms
[INFO] | Slowest test took      | 7s 292ms
[INFO] -----------------------------------------
[INFO]
[INFO] SERENITY REPORTS
[INFO]   - Full Report: file:///C:/Users/johns/projects/todomvc-screenplay-tutorial/target/site/serenity/index.html
[INFO]
[INFO] --- maven-failsafe-plugin:3.0.0-M5:verify (default) @ serenity-junit-screenplay-starter ---
[INFO] ------------------------------------------------------------------------
[INFO] BUILD SUCCESS
[INFO] ------------------------------------------------------------------------
[INFO] Total time:  21.660 s
[INFO] Finished at: 2022-04-04T13:34:26+01:00
[INFO] ------------------------------------------------------------------------
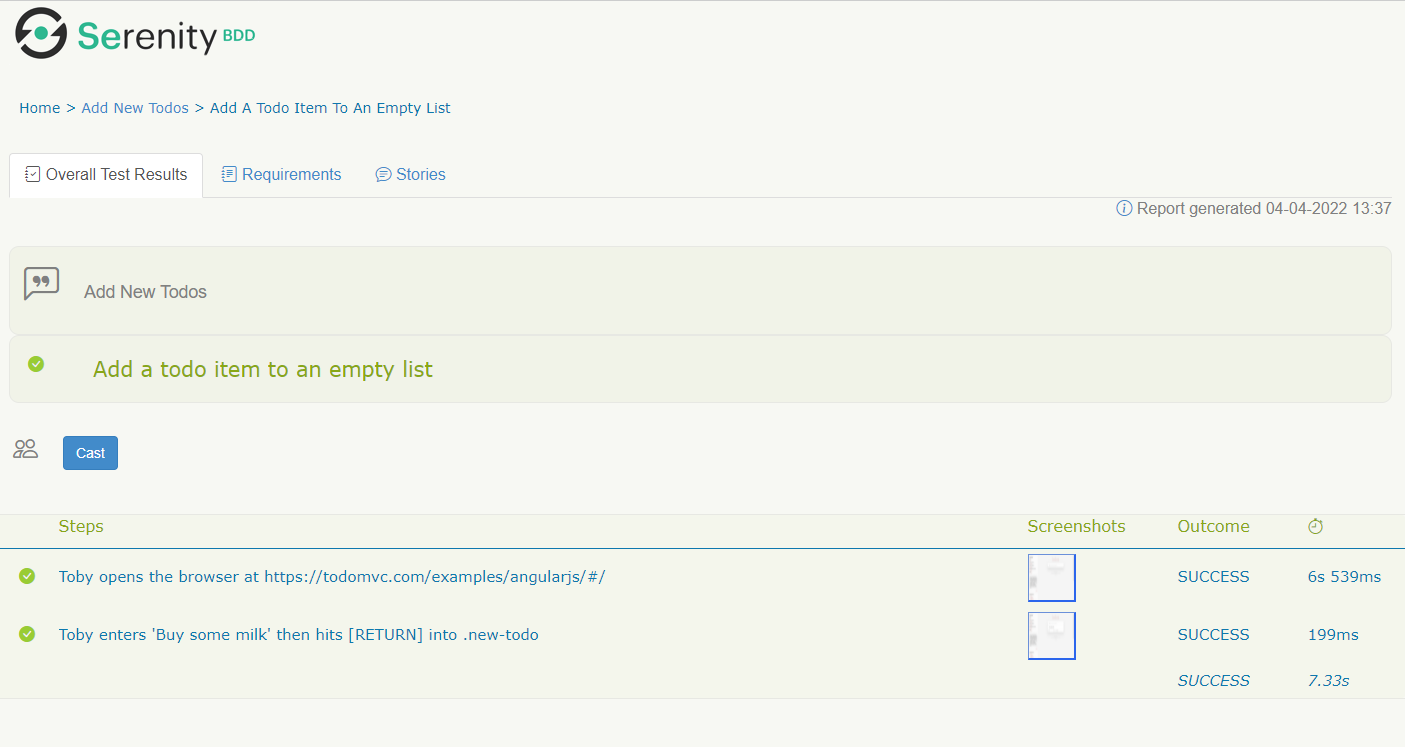
Now open the index.html file in the target/site/serenity directory using a web browser, and navigate to the Test Results tab. Open up the "Add a todo item to an empty list" scenario. Notice how the report renders the actor's actions almost word-for-word:
Conclusion
You have now seen just a little of the power of the Screenplay pattern. To learn more about what you can do with the Screenplay pattern, check out the full Screenplay Documentation.