Custom Fields in Reports
Custom Field Reporting
Custom fields can be included in the reports, using values that are either taken from the environment variables or passed into the build via system properties. This can be useful if you want to include the product or build version, the environment the tests were run on, or the test run date.
You can add custom fields to your report by setting system properties with the special prefix report.customfields. These can go in your serenity.properties file in the root directory of your project, or you can pass them in as command-line options.
For example, you could add the following properties to your serenity.properties file.
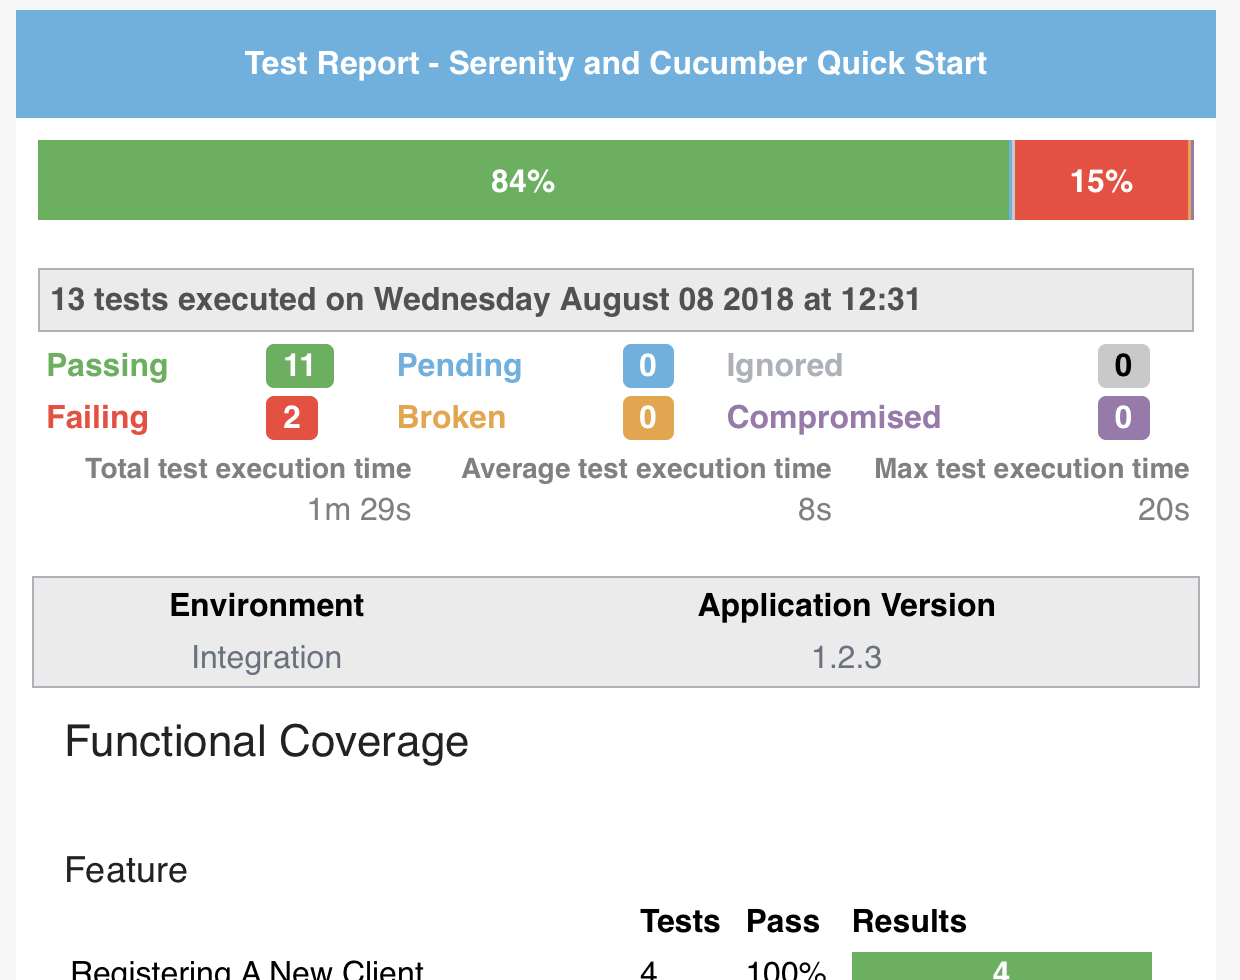
report.customfields.environment = Integration
report.customfields.ApplicationVersion = 1.2.3
This would produce a report containing these values, as shown here:
Accessing system variables
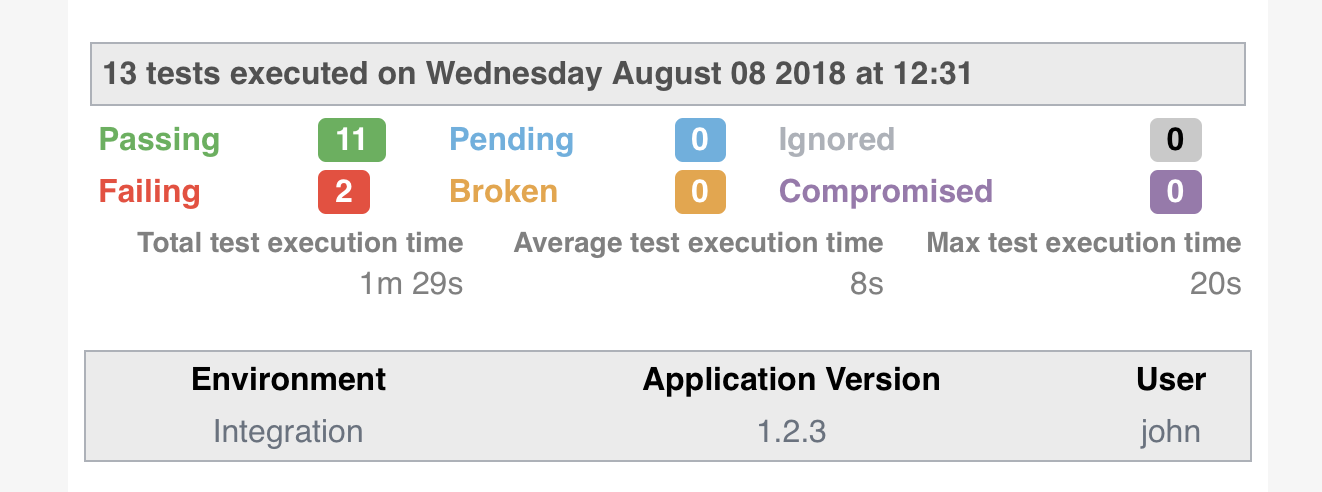
We can also access any system variables that Java has access to. For example, we could include the name of the user who ran the test run with the ${USER} system variable:
report.customfields.user = ${USER}
This property would result in a report like the following:
Not all system properties are available to Java. For example, on Linux systems, the $HOST variable gives the name of the local machine. We could include this in our report by adding the following property:
report.customfields.host = ${HOST}
However, since this variable is not available to Java, we would need to pass it to Serenity from the command line, like this:
mvn serenity:aggregate -DHOST=$HOST
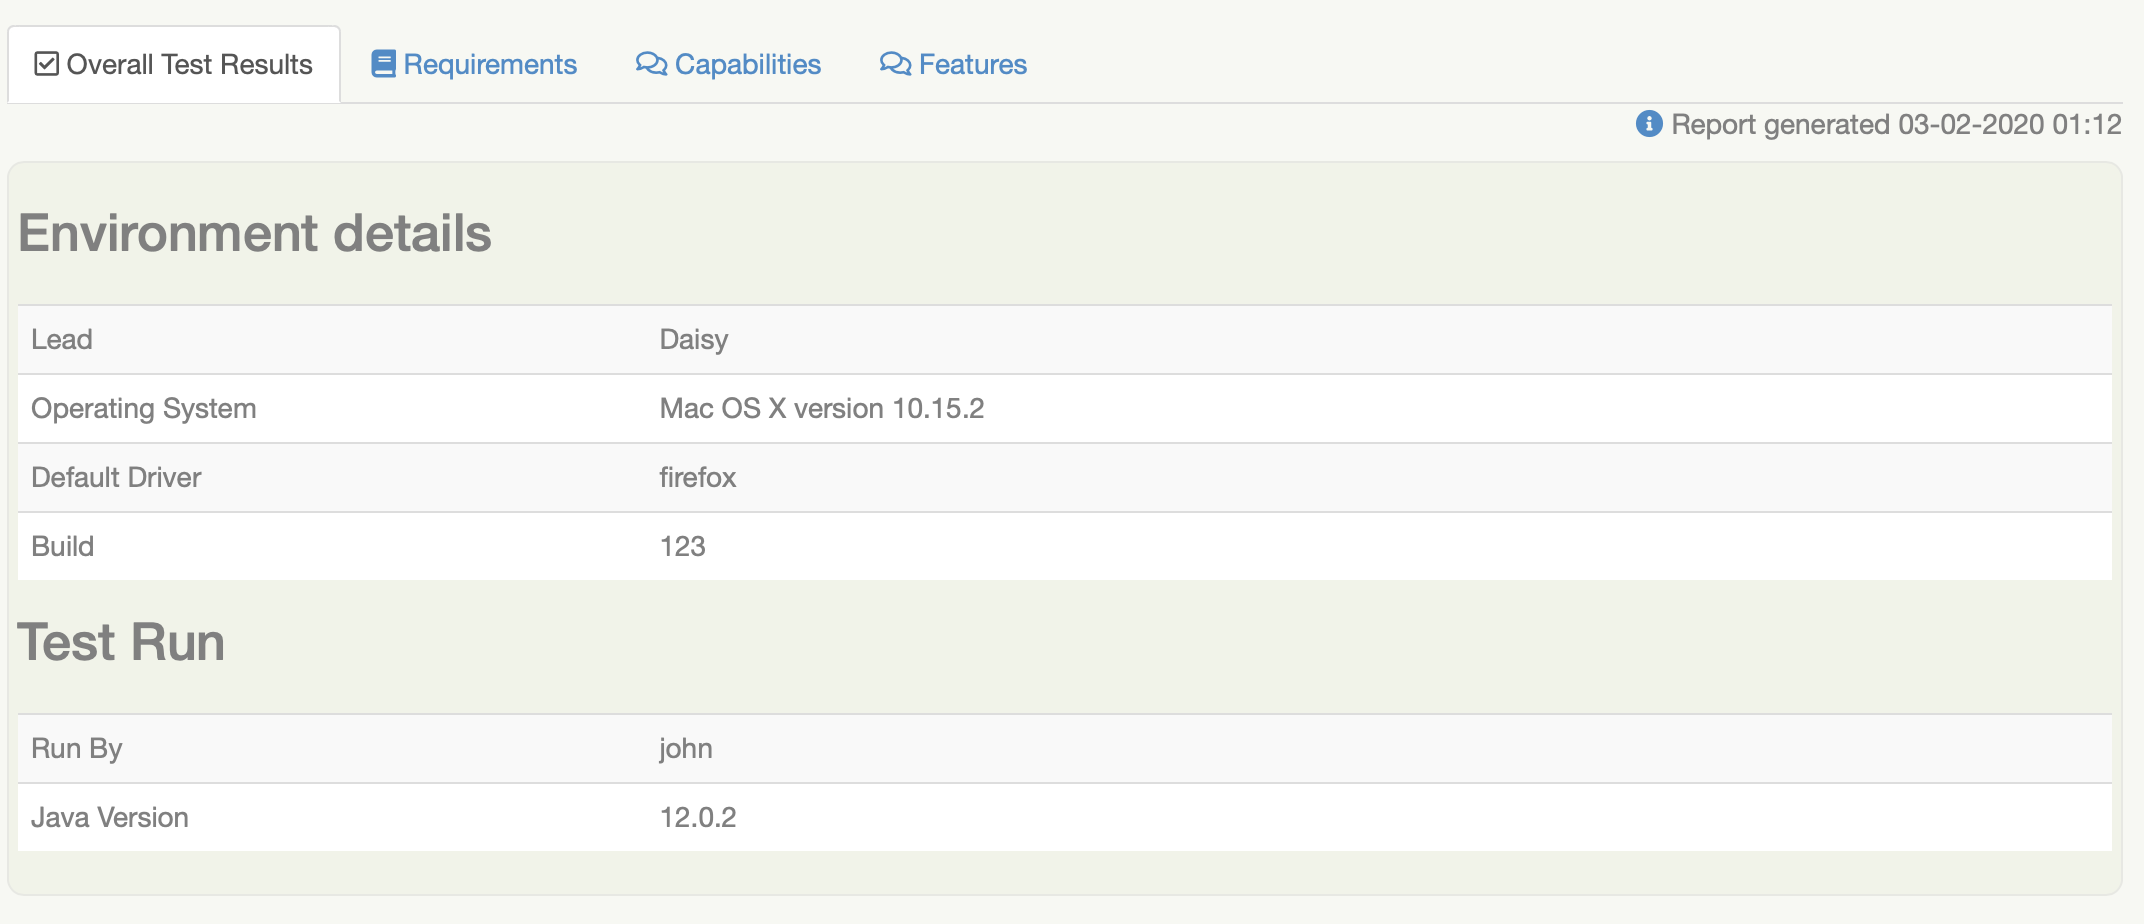
Overriding property values
[[custom-report-fields-with-provided-values]] .You can pass system properties from the command line image::custom-reports-with-provided-property.png[]
You can of course pass in other properties, to override the ones in your serenity.properties file. Here we override the application version:
mvn serenity:aggregate -DHOST=$HOST -Dreport.customfields.ApplicationVersion=1.2.4
But a more elegant solution, if you know you will always be passing in a variable, is to use a shorter variable in your serenity.properties file and then pass this one in. For example, here we use the environment property to display the current environment in the custom properties:
report.customfields.environment = ${environment}
We can set this value from the command line as shown here:
mvn serenity:aggregate -DHOST=$HOST -Denvironment=INT5
Using default values
If an environment variable doesn't exist, you can have specify a fallback value.
report.customfields.user = ${USER:-Unknown}
report.customfields.host = ${HOST:-} # Blank instead of the literal characters "${HOST}"
The mechanism behind the substitution: Apache Commons StringSubstitutor
Ordering the custom properties
By default, the fields will appear in an arbitrary order. You can force the fields to appear in a pre-determined order using the report.customfields.order field:
report.customfields.order=ApplicationVersion,environment,user,host
A complete example
A complete example of these properties and their various usages is shown here:
report.customfields.ApplicationVersion = 1.2.3
report.customfields.environment = ${environment}
report.customfields.user = ${USER}
report.customfields.host = ${HOST}
report.customfields.order=ApplicationVersion,environment,user,host
Custom Build Info
You can also add your own fields the the Build Info screen, using the sysinfo.* properties.
The sysinfo.* properties let you define fields and values that will appear in the Build Info page. For simple field-value combinations, the field appears alongside the other values on the Build Info screen:
sysinfo.lead = Daisy
You can use Groovy expressions to access system properties (that you can pass in from the command line). The env property gives you access to the current environment variables. For example, to display the current Jenkins build number, you could include the following line:
sysinfo.build = "${env.BUILD_NUMBER}"
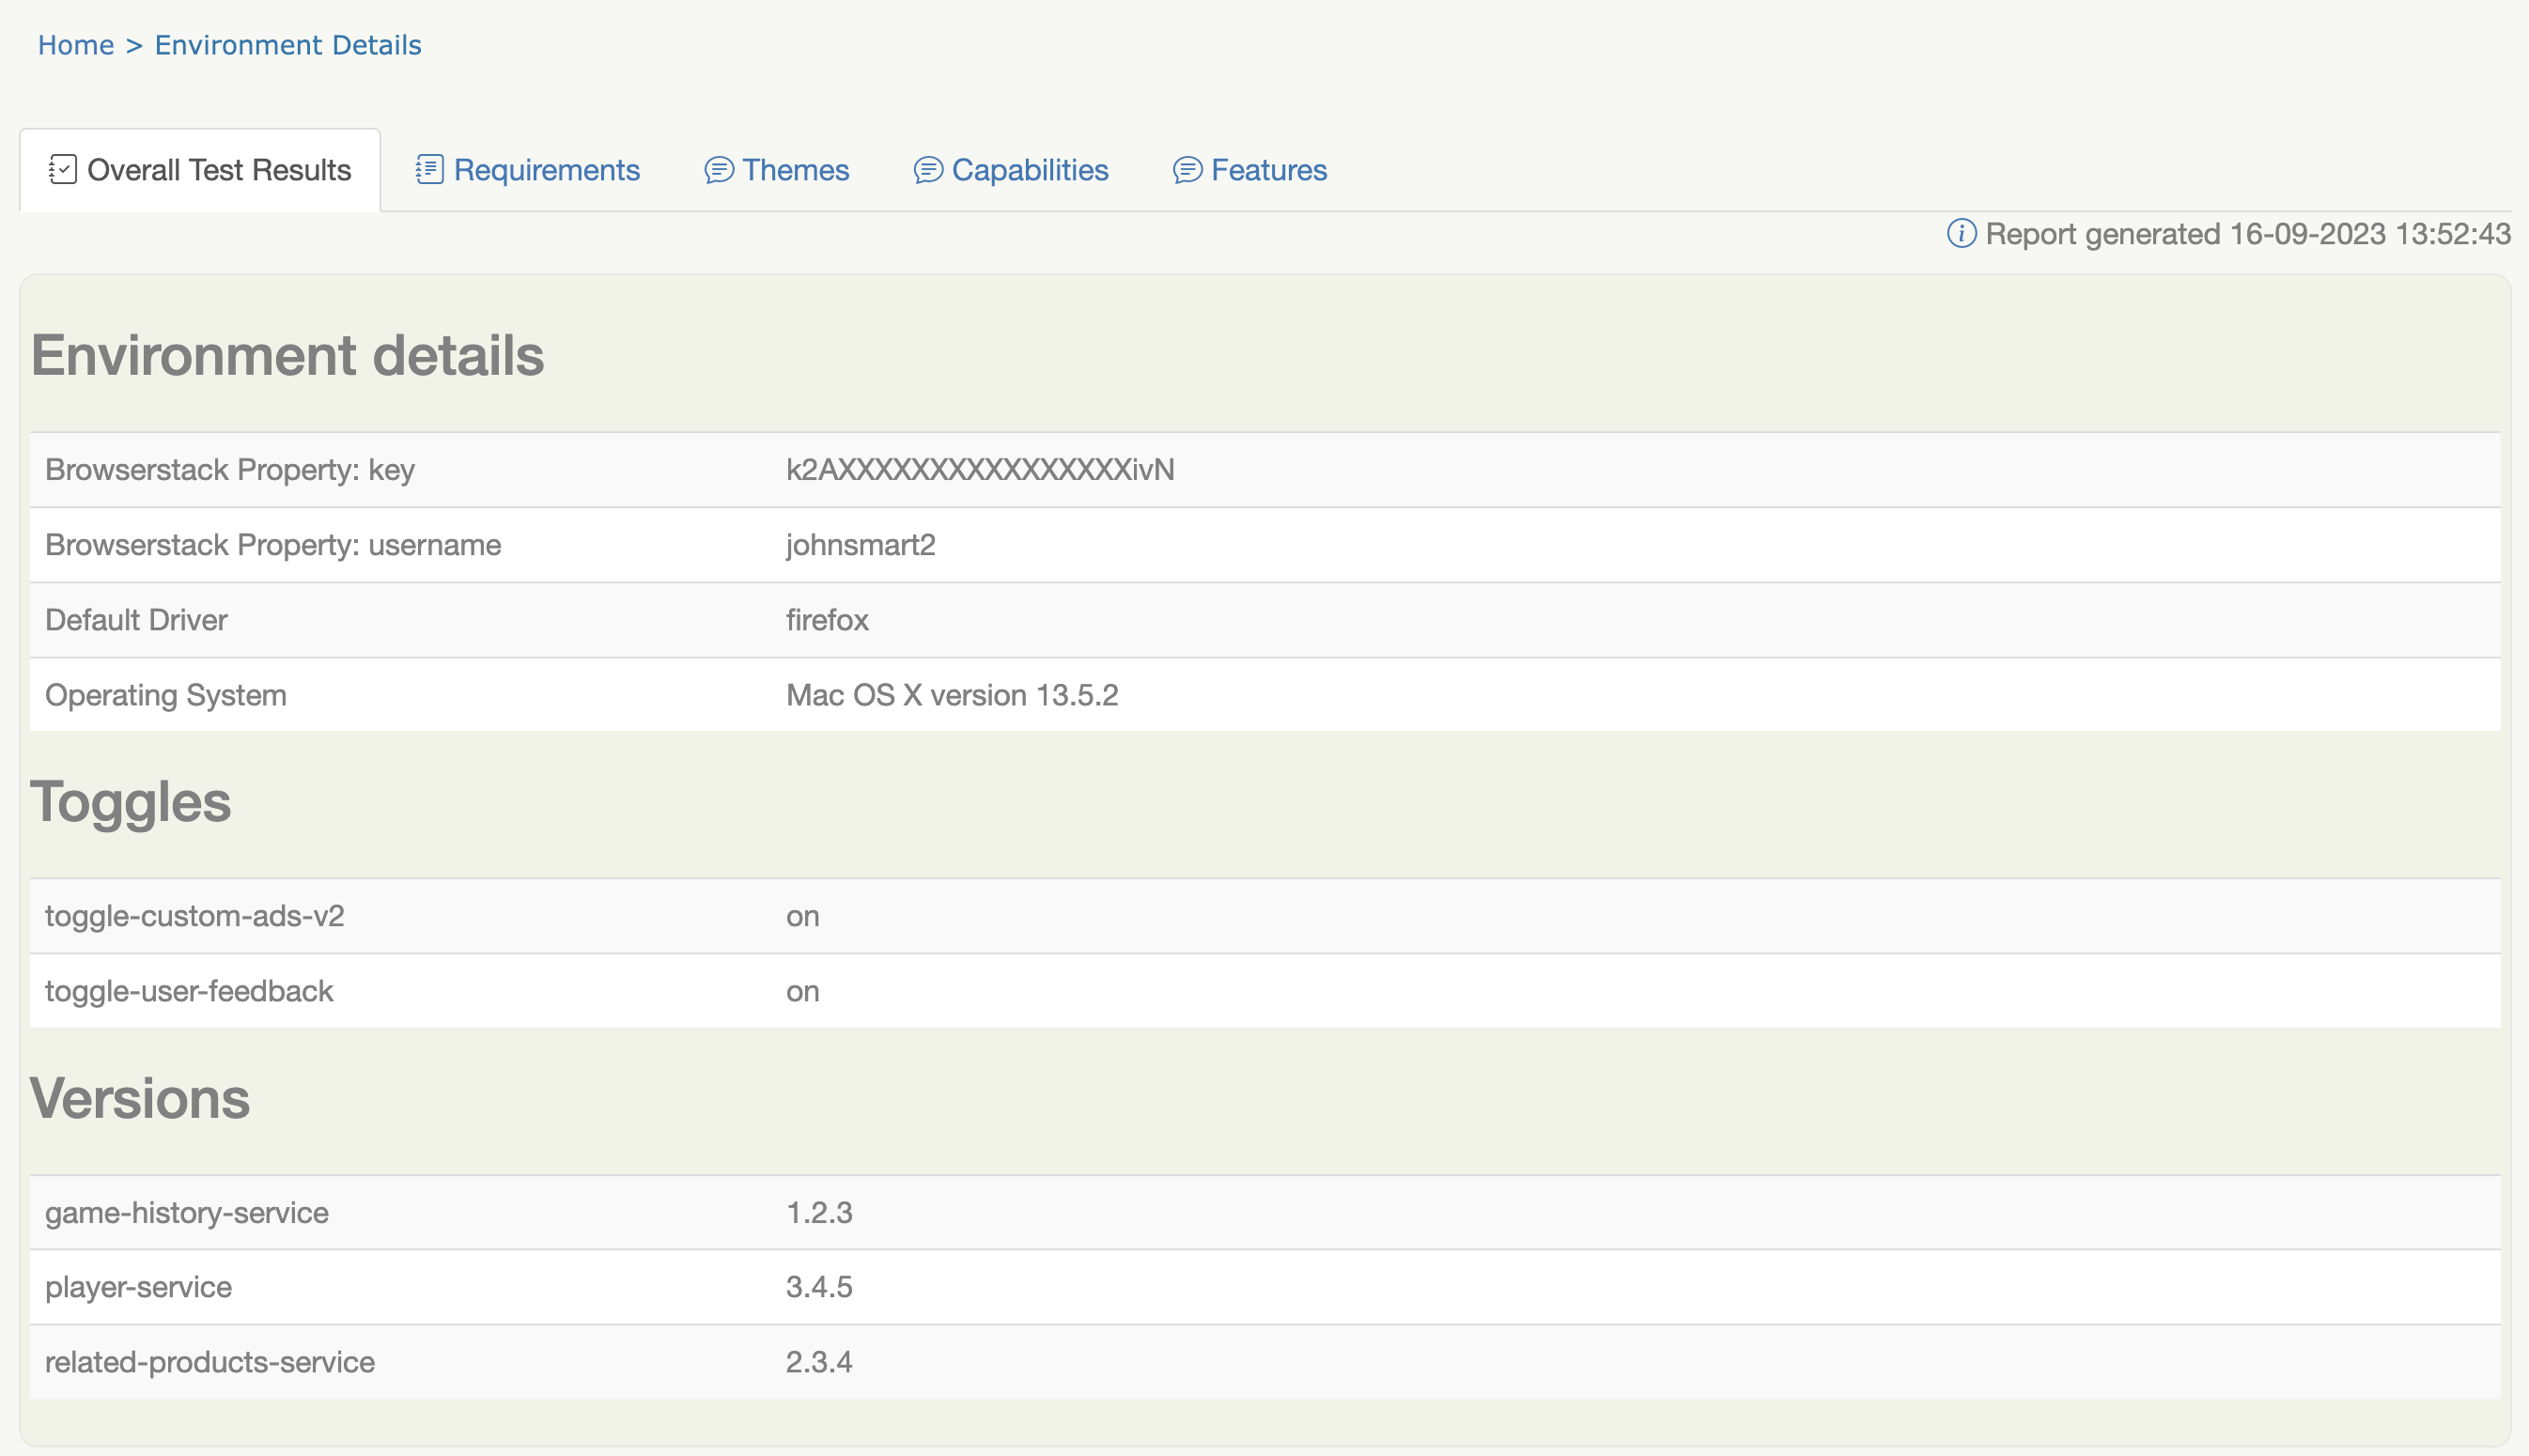
You can also group custom properties into sections with sub-titles. An example of such a configuration in the serenity.conf file is shown below:
sysinfo {
  lead = Daisy
  build = "${env.BUILD_NUMBER}"
  Test Run {
    Run By = "${env.USER}"
    Java Version = "${java.version}"
  }
}
The corresponding Build Info screen is shown below:
Defining build info programmatically
You can also use the BuildInfo class to add information to the Build Info page programmatically. Simply define the section, and add as many property name/value pairs as you want. You can see an example here:
BuildInfo.section("Toggles").setProperty("toggle-custom-ads-v2", "on");
BuildInfo.section("Toggles").setProperty("toggle-user-feedback", "on");

BuildInfo.section("Versions").setProperty("game-history-service", "1.2.3");
BuildInfo.section("Versions").setProperty("player-service", "3.4.5");
BuildInfo.section("Versions").setProperty("related-products-service", "2.3.4");